Sunday, September 25, 2011

hair.


I don't really like my hair up. I used to throw it in a ponytail e.v.e.r.y. day. I rarely wore it down. 
Now I rarely wear it up. 


But when I do, I can't stand to just throw it in a plain ponytail. I'm weird.. I know.
{Since I love braids I usually do a braid on the side or whatever.}

I like doing a high bun sometimes (as seen on Sydney of The Daybook here)
Except I have yet to make it THAT big. ;)

And I like messy buns, so when I saw this tutorial via VWB it caught my attention.

So on a day where I was rushed to school, I did it, but I wanted something a little different.

{let's not pay attention to my awkward face and tired eyes. let's just say waking up at 5:30am every morning catches up to you sooner or later ;)}
So instead of letting the braid hang that day, I folded it up and bobby pinned it.

what is your favorite hairstyle?
this isn't my favorite, but it sure is a super cute way to throw your hair up. it's pretty easy too!

-megan

Monday, September 19, 2011

things I ♥ monday - fall fashion

I think I will start doing a "things I ♥ monday" post {hopefully} every monday :)

I've seen these "things I ♥" post's all over blog land and love them, so I figured I'd do my own too :)

and right now, I'm loving fall fashion. We're on the line between summer and fall and I literally cannot wait! I'd rather be cold than hot, anyone else feel the same way?!?

my two must have's for fall:

boots, boots, boots!


I love the leg warmers (or just long socks, who knows ;) that go past the boots. I need to try that this fall!


....and scarves, scarves, scarves!


that lace scarf might is my favorite scarf I've seen this year... I'm going to have to make it... hmmm :)


these aren't necessarily fall-y but I ♥ them 


beautiful hair


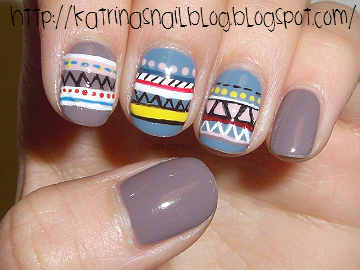
fun nails


what are you loving this week?

-megan 


Saturday, September 17, 2011

Repost: Braided Scarf


{I originally posted this tutorial on the amazing blog: Live. Love. Craft.}


Today I am going to show you a tutorial of mine, which was inspried when I was surfing on none other than Pinterest.

I saw this scarf here: http://pinterest.com/pin/157877472/
and knew I had to figure out how to make it. 


1. Start with two {size medium I think} plain t-shirts, in very good condition. You can use knit fabric, but I didn't have enough handy, so I used t-shirts.. worked just fine!


2. Cut of the sleeves and cut down the middle and sides, so you have four pieces of fabric. 


3. Take two of the pieces above and sew them {right sides together} to make on large strip.

(sorry I switched to orange here for the tutorial... but you follow the same steps for each color)


4. Fold over {right sides together!}


5. Sew down the sides, making a tube.


6. Turn right side out!

7. Repeat steps 1 - 6 with the other t-shirt.

So far you should have two tubes of fabric like this:


This is about the part that I had to get really creative to do the braid. So bear with me as I create this "braid" in a very non-professional way. ;)

8. Take a random strip of fabric and tie the ends of the two tubes together {don't freak out... this will create a circle so that we can create the "braid"}


9. Set your pieces up how you see them in the picture right below. {make sure your ties are at the very end}


Apparently, my brother says this is a square knot. I looked it up:) it's KIND OF like a square knot... But we'll just going to call it a square knot.

10.: (follow the picture sequence below)


You may have to read this a few times and study the picture below... but don't give up! It can be a little confusing
11. There's two ways I can explain this.
The 1st way: Take the ORANGE knot {on the right}. It should be on the bottom. Bring it up and through the middle of the gray fabric.
Now, Bring the GRAY knot {the left}, and bring it down and through the orange fabric. {sorry the picture doesn't show the gray part well} 


Or simply....

Tie another "square knot", so it's a double square knot.


13. Once you pull it tight you should end up with something like this:


14. Untie the ties at the end.

15. Fold over and iron the gray tube so it has a nice edge.
16. Tuck the orange tube inside the gray tube.


17. Sew.


18. Repeat steps 15-17 with the remaining tubes.


PHEW! Did you make it? It's a little more difficult tutorial, but it is SO worth it, I mean, you now have a super cute scarf for a fraction of the cost it would take to buy one. :)


If you have any questions, feel totally free to email me :).

-Megan

The Girl Creative
Sumo's Sweet StuffJoin  us Saturdays at tatertotsandjello.com for the weekend wrap 
 up           party!


Wednesday, September 14, 2011

Guest Post!


What?! A POST from Megan???? That's unheard of!

Just kidding, but I totally have neglected my blog this summer. :(

p.s. I'm over HERE today. :)

I have an awesome blog post for you all today, Alyssa from Live. Love. Craft. is here to show you all such a cute tee refashion!

Take it away girl! 

___________________________________________________________________________

Hey Making Lemonade readers! It’s Alyssa here, from Live. Love. Craft. And today I’m going to show you how to make your own custom painted tee shirt! It’s super quick and easy, and at max it will only cost you about 5$ including the tee shirt if you don’t have an old one on hand! You’ll simply need the color of acrylic paint you want, Decoart’s fabric painting medium, water, a marker, a tee shirt, and cardboard.

{here’s what the fabric painting medium looks like. You can find it in any craft store for about a buck. You just follow the instructions which are mixing certain parts water, medium, and paint.}


First get your tee shirt and lay it out flat. Put your cardboard in the middle so the paint doesn’t bleed through.

Get a washable marker and draw out what design you’d like. I choose to do a modern lace type design.


Mix your paint up and paint in your lines. It’s okay to paint on the lines. It may take a double coat.


After this I used a little silver to make it shimmer in some places. You can’t really tell in the picture though :( Now just let it dry like it says on the bottle and wash it like normal! Now you have your own custom shirt design!


The coolest thing about it though is that you can do whatever you want!


Thanks Megan for having me! I hope you guys like the tutorial, if you do, you should check my blog out!

~Alyssa


________________________________________________________________________________

How fun right?? And if you have read my blog before you know I love coral!
Go check out her blog - it has tons more cute ideas!!


-Megan